If your summer garden is overflowing with more produce than you can eat (hello,bumper crop of tomatoes!), then you might want to give canning a try. Don’t worry–it’s easier than you think.
Canning fruits and vegetables is a time-honored cooking method that allows you to preserve just about any type of produce and enjoy it throughout the year. The process of canning involves heating foods in jars to high temperatures, which kills microorganisms and drives air out of the containers and creates a vacuum seal.
Here’s how you can get started.
Canning Gear
Safe, effective canning requires the following supplies.
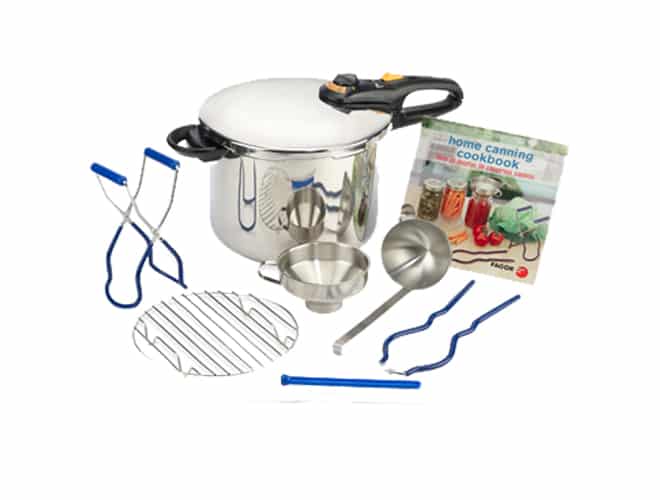
- Pressure canner. Also useful as a pressure cooker, this culinary tool provides the safest way to can, as it allows you to heat your jars and their contents to high temperatures. This heavy pot has a lid that locks when the pressure builds in the pot. Many pressure canners come with a cooking/canning rack, which holds the mason jars inside the canner. Quality models also possess dial gauges for accurate pressure control.
- Jars and lids. Mason and Ball jars and their two-part lids are designed for home canning and are your best choice.
- Canning utensils. Also include in your canning supplies a jar lifter for removing jars from hot water, a jar funnel, which helps you pack the jars, a magnetized lid wand for removing jar lid bands from hot water and clean cloths to wipe down jars and lids.
Getting Started
- Wash jars by hand and then sanitize them by boiling them in a large pot of hot water along with the lid rims for 10 minutes. Don’t boil the lids themselves, which are sensitive to heat. Instead, wash them in lukewarm water.
- Use the canning funnel to pack the jars with the food you’ve chosen to can. If you are canning fruits such as peaches and apples, cook them beforehand and then add water or syrup when you place them in the jar. Stop filling the jars when you have about ¼ inch between the top of the food and the top of the lid, which is known as the headspace.
- Clean the rims of your jars with a clean cloth or paper towel, making sure to remove any drips or crumbs that attached to the rim when you filled the jars. If these particles aren’t removed, they may affect the integrity of your seal.
- Place the lids and rims on the jars, securing so that they are finger tight, but not too tight or they may not seal correctly.
- Fill the pressure canner with water according to manufacturer directions. Heat the water to boiling and process the jars for the time recommended for the food you are canning.
- Remove jars from the pressure canner when the cooking time is up and place them on towels or cooling racks. Wait 12 to 24 hours and then check the seal by pressing down on the center of each lid. The top center of the lid should be concave and not give when you press on it. Or try tapping the lid with the bottom of a teaspoon. A high-pitch sound indicates it is sealed correctly, while a thud means it is not sealed properly.
- If you discover that a jar hasn’t sealed properly within 24 hours, you can remove the lid, add a new lid and reprocess.
- Label the lids of your jars with the contents and date.
Storage Tips
Canned goods stored in a cool, dry, dark area such as the back of the pantry last for at least a year. Avoid placing the containers near warm areas such as hot water pipes, which will cause the contents to lose quality more quickly.
Now that you know the basics for creating your own canned goods, you can enjoy summer-fresh produce any time of year.
Julie Bawden-Davis

