THE SECRET TO SALES? STOP SELLING
Forget the hard sell—it doesn’t work. Try these low-key selling tips, and your products and services will nearly sell themselves.
“Selling is much different from representing,” Buckley says. “It’s more like being a doctor or therapist. You listen to potential customers about what they want or need, and then you introduce your product as the answer. You want people to think buying your services was their idea.”
When selling your business, telling people how good you are usually falls on deaf ears, says Cheryl Osborn, president of Casco Contractors, Inc., a design-build general contractor for building owners, property managers and tenants. “Rather than direct selling, you need to prove your value to potential clients,” Osborn says.
Instead of listing the many ways your product or service is just what the client needs, simply listen, says Buckley, who sells to dentists. “I’ll ask the dentists to tell me about their practices and how business has been, which gives me a great deal of useful information, including what motivates them as buyers,” she says. “Knowing their motivation directs my sales tactics. For instance, the tech savvy dentist will want to hear about the technology of the product, while the person interested in money will appreciate hearing about how much other dentists have earned.”
RELATED: Old-School Rules That Increase Sales
It’s important that the client sets the stage and does all the talking at first, Osborn agrees. “Telling customers what they need is offensive, like an ‘eye-rolling’ creepy sales pitch. Sometimes it may take you asking five or six well-constructed questions to get feedback, but if you’re patient, the potential client will divulge useful information.”
No client wants to engage with you unless you can help in some way, Osborn says. “By listening to your customers and getting to know what troubles them, you are able to customize a solution that involves your product. Rather than selling, your job is problem solving, which is a win-win for everyone.”
Selling also works when you educate customers about how your product or service can help differentiate them from their competitors, Buckley says.
“It’s all about telling them they can be special and different if only they try your product or service,” she says. One particular product she’s selling, which helps dentists to treat pain without drugs, has a 95 percent clinical success rate. “Such information educates potential clients about the value of the product. Share as much information as possible without being overwhelming, so clients can make their own decisions.”
RELATED: 6 Mistakes Costing You Sales
Osborn, on the other hand, tends to lean heavier on stories than statistics. “I’ve found that if I give potential clients a bunch of stats about my company, they get bored and feel like I’m hard selling,” she says. “Tell anecdotes about other people who faced similar challenges and found solutions. Such stories reveal how you can help them.”
If you truly believe in the product or service you’re selling, that enthusiasm will impress potential clients.
“I’m really passionate about the product I’m selling and excited about how it can help people by relieving their pain,” Buckley says. “People see how much I believe in the dental system, and that encourages them to ask for the specifics. Let your confidence and commitment to your product shine through, and you can’t help but attract sales.”
If you take these low-key sales tactics to heart, you’ll may discover that your products and services nearly sell themselves.
Read more about small business sales.
A freelancer since 1985, Julie Bawden-Davis has written for many publications, including Entrepreneur, Better Homes & Gardens and Family Circle.
Photo: iStockphoto
It’s that time of year: You’re hankering for summertime classics–juicy burgers, sizzling steaks, or tender ribs–but what you reallywant is to enjoy that smoky goodness from your own backyard. Ready to give it a try? Achieving outdoor-chef bliss at home is possible, if you have the right equipment. These hot tips can help you choose the gear you need to get those outdoor flavors at home.

Before we go any further, let’s clarify. While both grilling and smoking are great techniques, they are not the same thing. When you grill, food is cooked quickly–at a high temperature–over a heat source, such as hot coals or gas-powered flames. Grilling proponents claim that rapid cooking creates a nice sear on the meat, which locks in flavor and keeps it juicy. It’s ideal for foods that benefit from the flames: steaks, burgers, chops, chicken, fish, shrimp and vegetables can all be deliciously grilled. In smoking, on the other hand, meat is cooked more slowly and at a lower temperature, by exposing it to smoky, heated air — “low and slow” in smoker parlance. Fans say smoked meat has a totally unique, rich flavor, and that slow-cooking breaks down toughness in larger cuts of meat, leaving it especially tender. This is ideal for cuts like brisket, ribs, and pork shoulder, but can also impart great flavor to other foods like turkey or lamb. Many foods can be cooked either way, depending on the desired end result. You can slow cook (but not necessarily smoke) on most grills, but you can’t grill on most smokers.
First, think about the type of grill you’d prefer:
Next, determine the size of grill you need. First, determine how much cooking area you need. Cooking area is the actual space you’ll have available for burgers, steaks, or whatever’s on your menu. Too large, and you’ll waste fuel and time heating surface you won’t need. Too little, and you’ll spend all day flipping little batches of burgers at the family picnic. The other thing to consider is the amount of space you have for storing your grill. Get one that will cook what you need, but that won’t take over your entire outdoor space.
There are many types of smokers. There are small units appropriate for smoking small batches of food, drum-style units and large smoker rigs perfect for a block party. As their name suggests, bullet style units are shaped like a bullet, while cabinet-style smokers open like a small refrigerator. All smokers have interior racks where you set the meat, drip pans and a heat source.
Experiment and have some fun, and you’ll be the neighborhood grillmaster (or smokemaster) in no time!
Tell us about your adventures in outdoor cooking–do you have a juicy grill or smoker story to share?
Julie Bawden-Davis
Shade garden While a shade garden could mean a spot in deep shade, it can also be a location that receives dappled sunlight throughout the day or a short amount of morning sun followed by afternoon shade. Shade garden locations tend to be northern or eastern. Sun garden A sun garden is defined by a location that receives four or more hours of sunlight throughout the day. Such a location is usually located in a southern or western exposure. Plants for shade and sun To have success with sun or shade gardening, you must choose plants that are suited for each type of growing condition. A shade plant will not grow well in a sunny location. The harsh rays of the sun will burn the tender foliage, and the plant is likely to die. Likewise, plants that require sun to thrive will do poorly in low-light conditions. They will experience stunted growth, and if they flower or fruit, they are unlikely to do so in shady conditions. Determine if plants are for shade or sun by consulting the plant tags and inquiring with nursery personnel. A reputable garden center will have the shade plants on display in shady conditions such as under shade cloth, whereas the sun plants will be out in full sun. Some popular shade-loving plants include impatiens, begonia, coleus and Japanese maple. For sun plants, you’ll find geranium, rose, petunia and black-eyed Susan. Sun garden plans For the best presentation with a sun garden, use the layered method when planting. This requires that you plant tall plants in the back of the garden, followed by medium-sized growers in the middle and then finish off the front of the bed with low-growers and ground covers. Such a planting scheme guarantees that you get a good view of all of the plants at once. Shade garden plans Build an eye-catching shade garden by creating a backdrop of foliage in varying shades of green and accenting with variegated foliage that includes colors like red, purple and yellow. Then, place flowering plants that prefer dim conditions in strategic spots throughout the shade garden. If you will be viewing or enjoying the shade garden at night, include white- and silver-colored flowers and foliage, as they will appear to shimmer in the moonlight.
Do you know what you should do just as soon as you’ve shipped off that tax return?
You should shred all the paper that you no longer need. Okay, maybe it’s not as exciting as a celebratory glass of champagne, but it is a great way to protect your financial and personal data: Use a good shredder, and you can feel confident that your personal information won’t wind up in the wrong hands.
We can help you choose. Before you buy a shredder, make sure you know these five facts:
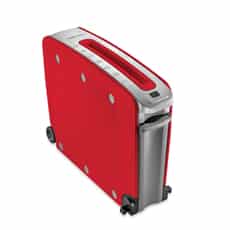
There are shredders to fit almost any space, from small, desktop models to larger, wastebasket-sized, shredders. If you’ll use it often, consider a freestanding model that you can leave out for easy access. Don’t worry that it will be an eyesore: Shredders come in various colors and styles, making it possible to choose one that fits your home’s décor. If you’ll use it rarely, it might be easier to get a model that you can store in a drawer or on a shelf.
The most important consideration when choosing a shredder is the machine’s cut-style, a.k.a, the exact way it shreds a piece of paper.
Determining how much, and how often, you’ll have things to shred will help you decide how powerful a shredder you need.
A shredder’s product listing will indicate how both how many pages you can shred in a day, and how many pages you can shred at one time. In general, light usage in the average household is around 50 or fewer sheets a day. Shredders designed for this load can usually handle from 4 to 12 pages at one time. If you will be shredding more, look for a model that can handle a higher volume–because going over the recommended capacity can burn out the shredder’s motor.
Of course, you should consider what you are shredding as well: Make sure that the opening of any shredder you’re considering is large enough to accommodate the size of paper you’ll shred, and if you want to shred items like credit cards and CDs, double-check that the machine can handle those materials.
Paper jams interrupt shredding and can sometimes be difficult to untangle, so look for features that will help you avoid them: Some models sense when the paper is too thick, and will turn off before a jam occurs.
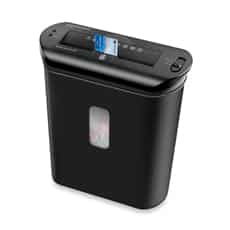 And while it’s hardly required, another great tool is an auto button. This will let you keep the machine on but not running, which saves you from having to turn the shredder off and on as you ready paperwork for shredding.Waiting until the shredder is stuffed can lead to jams and overheating, and makes for messy emptying. To avoid overstuffing, look for shredders with a clear shredder compartment or a window into the machine — some even feature an indicator light to let you know when the compartment is reaching capacity.
Once you know what you need in a shredder, finding the right one for you is easy.
Julie Bawden-Davis
Having the right logo can capture customers and influence buyers. Here’s what you need to know about creating one.
Julie Bawden-Davis
APRIL 15, 2013When Cindy Hounsell founded the Washington D.C.-based Women’s Institute for a Secure Retirement (WISER) in 1996, she needed an eye-catching logo to brand the nonprofit business and appeal to her target market. She hired a graphic designer to help create a visual representation of her vision.“Given that my market is women planning retirement, I needed a logo that would make clients feel like things would work out financially and they’d become wiser in the process,” says Hounsell, who still gets compliments on the logo.

“Showing a woman under a tree reading works well on various levels,” she says. “The logo communicates she has the leisure time to read, the book suggests education, and the large tree shelters her, indicating that it’s possible to build up a retirement nest egg so she can spend her days relaxing.”
![]()
Such effective company packaging through a well-crafted logo is a powerful sales tool for the small-business owner, helping a company stand out in a crowded marketplace and building name recognition, says Mary A. Pettigrew, principal of ampersand graphic design, inc.
, whose tagline, “communications with a conscience,” evolved from the fact that many of ampersand’s clients are from the not-for-profit world.”Logos are so important that large companies spend $30,000 to $100,000 or more creating them,” Pettigrew says. “Entrepreneurs certainly don’t have to spend that much, but they do need an effective logo. The reality is that in the last decade, communications have become extremely colorful and eye-catching, and if you don’t create an attractive logo, potential customers will pass you by.”
Keep the following tips in mind when creating a powerful company logo that builds your brand.
While you probably don’t have the hours or resources to conduct multiple focus groups to research your logo like large companies do, it is in your best interest to devote some time to the development phase.
“Chances are you’ve thought a lot about your mission statement and who your customers are,” Pettigrew says. “Use that information to come up with a logo that subliminally portrays your mission statement.”
To do this, she suggests coming up with words you want to associate with your business. “Think of feelings you want to portray, like strong, secure, fast and reliable,” she says. “A good designer can take such intangibles and use them to create a logo.”
RELATED: How to Get Customers to Remember Your Brand
In conjunction with your logo, devise a tagline that sums up your services, which can also be incorporated into a logo. “For instance, your tagline might mention critical deliverables, such as the fact that your company is trustworthy and offers security, which is something you want to communicate in the logo,” she says.

Good taglines tend to run three to seven words and succinctly sum up the company’s services and attributes, while also augmenting the logo itself. Think Nike’s “Just Do It” and YP’s (formerly Yellow Pages’) “Let Your Fingers Do the Walking.”
Color creates an often subliminal emotional response, so it’s important to choose your logo hues carefully. People respond to colors differently, which is why stop signs are red. While this may be a good accent color, you generally don’t want an all red logo, as that can be off-putting. Greens and blues, on the other hand, are more approachable and assuring.
RELATED: 7 Cheap Ways to Brand Your Small Business
The best logos are deceptively simple. “To create something memorable and unique, consider using your logo letters to convey your message,” says Pettigrew, whose own logo incorporates the ampersand symbol into her name in place of the “e.” “FedEx does a superb job of using lettering,” she says of what is considered one of the best logos of all time. The E and X at the end of FedEx are merged together and the negative white space created by the merging produces an arrow.
The best logos, like Apple and Volkswagen, use original artwork, Pettigrew says, so “avoid clip-art, which looks cheesy.”
Also avoid using a logo that features an image with no meaning. “A logo is more than a pretty face,” she says. “Just because an image looks cool doesn’t mean that it’s going to work for your business. It’s important that people see the logo and know what you’re selling.”
Don’t create a busy or half-baked logo. “Firefox is busy and Wikipedia doesn’t work well either,” she says. “Verizon’s logo doesn’t show much creativity or even resolution; it seems like a work in progress.”
Finally, whatever you do, avoid creating a logo with an unintended double meaning. You want to get the attention of customers—not shock them.
Get more marketing tips and advice. Check out these marketing articles.
A freelancer since 1985, Julie Bawden-Davis has written for many publications, including Entrepreneur, Better Homes & Gardens and Family Circle. Julie blogs via Contently.com.
Photo: Getty Images
by Julie Bawden-Davis When to plant herbs Herbs grow quickly when planted in the spring. At what point in the spring you plant your herbs depends on your climate. To avoid a slow start or plant damage, wait until the danger of frost has passed before planting herbs. Where to plant herbs Most herbs require a sunny spot with good air circulation in which to thrive. Choose an area that receives at least four to six hours of direct sunlight a day. Some herbs, such as lemon balm, lovage, chervil, mint and parsley, require light shade. Choose a location that drains well, as many herbs such as rosemary and thyme, require sharp, fast drainage. If you are unsure of the drainage in your proposed planting area, dig a 6- to 12-inch hole and fill it with water. The hole will drain within 90 minutes if the drainage is adequate. If you find that the drainage is poor, before planting herbs, amend the soil with a 6-inch layer of compost that you work into the first 8 to 12 inches of soil. Also, plant in a site free of weeds. Rake or dig out weeds with a hand trowel before planting herbs in the chosen planting site. Potted herbs Many herbs thrive in containers, and growing them in pots enables you to place them near the back door for easy harvesting. Potted herbs also make a decorative addition to the garden. When planting in containers, use a high-quality potting soil with added perlite or pumice, which ensures good drainage. Herbs also thrive in raised beds, which are essentially large containers. How to plant herbs Successfully planting herbs requires that you plant each herb at the same level as the plant is in its original nursery container. By doing this, you avoid planting the herbs too high or too low, which are both situations that can result in plant failure. Once you have the plant in the soil, firmly pat down the soil surrounding the plant and water well. Water properly Water herbs when the top 2 to 3 inches of soil dries. Ground plants require watering less frequently than containers, which can dry out in an afternoon during hot weather. Avoid over-watering herbs, as this leads to lush, yet flavorless, growth. Fertilize infrequently Feed your herbs just once or twice during the growing season. Over-fertilized herbs produce thick, green growth with little flavor. Overfeeding dilutes the essential oil production of the herbs, and the oils are what give herbs their intense aroma and flavor. Pinch and prune Enjoy the bounty of your herbs often by pinching back on a regular basis. Pruning out growth keeps the plant bushy and healthy and leads to new growth. Plants that aren’t pinched back frequently become rangy and unattractive.
Kids and rain can be a rough mix. If April showers are falling and singing “Rain, Rain, Go Away” is beginning to wear thin, fear not: We have a dreary day plan of action. The following rainy day activities will keep the TV (and the whining!) off for hours.
There are craft kits for kids for almost every interest and skill level. You can (clockwise, from top left):

The best way to have fun with games it to think beyond the basic board. Here are some of our favorite ideas (from left):


Both girls and boys love dress up and make-believe. You can buy a costume, but you certainly don’t have to: Plan ahead for rainy day fun by visiting the thrift store and stocking up on old clothing, shoes, hats, wigs and costume jewelry. Or just let them dress up in your clothes for a giggle.

Get out your favorite dessert cookbooks and pick out some recipes for tasty items like cupcakes, cookies, bars, and pies. You could even make cotton candy.
With indoor fun like this, it won’t be long before the kids are hoping to be “trapped” inside.
Do you have any fun rainy day activities that you and your kids enjoy? Share them in the comments section below.
![]()
APRIL 04, 2013When her son Brad was 16, veterinarian Paula Baker, owner of Allandale Veterinary Clinic
in Austin, Texas, decided it was time to put him on staff at the clinic.“I was tired of handing him unearned cash and wanted him to start saving for college spending money,” Baker says of her son, who is now a sophomore at Texas A&M University. “Having Brad work for me went really well. He was dedicated and dependable and got along well with the other employees.”
Though many small-business owners know the advantages of hiring their kids, such as encouraging a work ethic, what they don’t always realize is that putting minor children on staff can also save you tax money, says Larchmont, New York, tax attorney and former IRS special agent Julian Block
, author of Julian Block’s Easy Tax Guide for Writers, Photographers, and Other Freelancers
.“If your children can perform necessary tasks for your company, this is a savvy and perfectly legal way to take care of their allowance or spending money—at the expense of the IRS,” says Block, who notes that you can hire kids to work for any small-business endeavor, be it full time, part time, long-established or a brand new company.
RELATED: Three Tax Credits That Can Put Money In Your Pocket
According to IRS rules
, any payments for the services of a child under the age of 18, who works for a parent in his or her business, are not subject to social security and Medicare taxes if the business or trade is a husband and wife partnership or sole proprietorship owned by the parent(s). “This tax benefit allows you to shift some income out of your higher tax bracket into your child’s, which is lower, and doing so can lower your Social Security taxes by as much as 15.3 percent,” Block says.This tactic also doesn’t initiate any “kiddie tax” rules, which are notorious for preventing grandparents and parents from shielding investment income in a child’s lower tax bracket.
“A parent’s business can deduct the wages, which are taxed at the child’s lowered rate, which often means it makes more sense to pay a child wages than to give the child property,” Block says.
Income your child earns can be offset by a standard deduction that is six times greater than it would be if it were investment income. “For 2013, the standard deduction for investment income is capped at just $1,000, but for kid’s earned income it caps at $6,100, which means your child can earn up to that amount without paying taxes,” Block says. “This means if you’re in the 30 percent federal and state bracket, your taxes will be lowered by about $1,830.”
RELATED: 5 Most Commonly Overlooked Small Business Tax Deductions
Not surprisingly, the IRS is suspicious of deductions for child labor, so it’s important to follow the rules to the letter. You must be able to establish that your child truly works for you, and the work he or she does is possible according to age. (Don’t expect the IRS to agree that your 5-year-old has been successfully answering the phone.)
The wages you pay to your children must also be reasonable and commensurate with the going rate for that duty. Emptying trashcans at $30 an hour isn’t going to cut it. Making deliveries and assisting with computer related tasks, on the other hand, could warrant $15 to $20 per hour.
The bottom line is to treat your children as you would any other employees, Block says. “Even if they’re classified as exempt, make it official by having them fill out W-2 forms. And always pay them with company checks.”
Now that you know the tax benefits of hiring your children, you can tell them the good news: “You’re hired.”
Read more finance articles.
A freelancer since 1985, Julie Bawden-Davis has written for many publications, including Entrepreneur, Better Homes & Gardens and Family Circle. Julie blogs via Contently.com.
Photo: Getty Images
![]()
Move out of a rental, and you’re likely to have plans for the security deposit your landlord has been kindly holding for you. Make sure you get your hard-earned money returned when you vacate the premises by keeping the following five tips in mind.
Pre-qualify your potential landlord
Before agreeing to the rental, check out the individual or company renting the apartment. Look on the Better Business Bureau’s website for information and check online reviews.
Perform your own pre-move-in inspection
Inspect the apartment or house before you move in, noting any problem areas, such as discolorations on the walls and chipped tiles. Take time-stamped photos during the inspection, so you have proof of the apartment’s condition before you move. Give a copy of the photos and your inspection report to the landlord.
Read your lease
Once you sign a lease, you’ve agreed to whatever it says, so it’s important to read it thoroughly. Check the fine print for cleaning fees to be taken from your deposit. If possible, renegotiate the lease to state that you will leave the premises spotless upon your departure and will therefore get the entire deposit returned.
Keep thorough records
While living in the rental, record all significant events that occur. For instance, if there is a leak under the kitchen sink that causes water damage, note this and how the issue was resolved. That way you won’t be charged for damages when you move out.
Give adequate notice
Check your contract regarding how much notice you are required to give before moving out. Vacating early can cause a forfeiture of part or all of your security deposit. Most landlords require a 30-day notice. Make the record official by sending the notice to your landlord by certified mail with return receipt requested. Doing this will provide proof that you sent your move-out notification in a timely manner.
Have any other effective tactics for getting a security deposit returned? Please share them in the comments.
While small rooms have their benefits, including coziness, when the square footage is limited it can feel like the walls are closing in. Decorating a small room so that you’re opening a small space up and making it look bigger is possible–if you keep a few design strategies in mind.

Raising the eye up to the ceiling gives the illusion of grandeur and depth. Give it a try: Hang a vining plant in the corner of the room, which will draw the view up. You could also hand long, vertical artwork starting near the ceiling or include some decorative pendant lighting.
Creating “rooms” within the room gives a sense of square footage. Create permeable “walls” by hanging sheer curtains or beading from the ceiling, using decorative room dividers and thin shelving units to mark out areas of the room.
Lighter colors tend to open up a space, while darker hues give a closed-in look. Opt for mellow colors like yellow, beige, white, pale green, and pink on the walls and accent trim with darker colors. If such a color scheme isn’t appealing and you prefer more vibrant colors on the walls, alternate between light and dark.
While lighter hues do make a room look larger, it’s not necessary to go with all white walls. Instead, focus on the color of the ceiling. By painting the fifth wall white or off-white you create the appearance of a raised ceiling no matter what color the walls are.
Excessive odds and ends make a space seem small and stuffy. Edit out knick knacks, sticking with a few treasured possessions and keep the center of the room open and free. Avoid furniture that attracts clutter like coffee tables. Put paperwork and items like remote controls in drawers.
Carpeting has a way of closing in a space and making it seem claustrophobic. Opt for wood, large tiles, or stained concrete, instead, and add an area rug if you want to add color or soften things up.

Low, long pieces of furniture (like this one) keep wall space open, which gives an illusion of more space. Avoid tall, hulking items like large bookcases and cabinets, which can dwarf a room. If you choose to use a tall furniture item, opt for a piece that is thin depth-wise and paint it the same shade as the walls.
Let in as much natural light as possible during the day. At night, task lighting that illuminates a small portion of the room and washes the rest of the space into darkness adds depth to a room. Also equip overall general lighting, such as a ceiling-mounted fixtures, with dimming capability.
Use furniture pieces that do double-duty. Opt for beds with drawers underneath, ottomans that offer storage and seating for guests.
Rather than bulky bookcases or storage cabinets, hang wall shelving. Paint the shelves the same color as the walls and they’ll blend in and keep the space open.

Reflecting various areas of the room gives the illusion of space multiplied. Place wall mirrors in a location where they will reflect an attractive view, such as the outdoors or a piece of art.
Heavy drapes or bulky shutters make a room look smaller. Opt for sheer curtains or window shades and for a decorative flair, choose simple valances.
Now that you’re armed with these small space design tricks, you can make your room look like a palace.
What’s your favorite trick for making your room look bigger?
As a lifelong allergy sufferer, I’m well aware that windows, with their direct access to the outdoors, can have a significant impact on symptoms. Fortunately, it is possible to allergy proof your windows–if you keep a few tips in mind.
If you suffer from allergies, you don’t always have to have the windows closed … just most of the time, unfortunately.
Dirty, dusty windows are a breeding ground for allergy causing dust mites. Dust is particularly prone to building up on flat surfaces such as the windowsill. Keep the windows allergy-free by regularly damp-dusting with a 5-percent bleach solution. The will rid the area of mites and mold spores, and the damp cloth will prevent the dust from flying into the air and irritating you. For extra protection, wear a dust mask when cleaning windows.
 Dust-catching window coverings, such as heavy drapes and blinds with small slats that are hard to clean, are notorious breeding grounds for dust mites. Better choices include window shades and blinds or shutters with large slats that can be easily vacuumed. Clean blinds, shutters and shades weekly with a vacuum that features a high-efficiency particulate air (HEPA) filter, and damp clean them once every three to six months.
A nearly allergen-free window covering option is privacy window film. Apply this directly to the window, which gives it a frosted look. It also reduces glare and UV rays.
If you must hang curtains, choose lightweight fabric that is washable. Washing the curtains in hot water every three months will keep them from building up dust mites.
It can be a lot of effort, but try these allergy fighting tactics with your windows, and with luck, you can prevent many allergens from getting inside and making your miserable. Avoiding the sneezing and sniffles is definitely worth the effort.
What household tricks have helped you with your allergies? Tell us below!
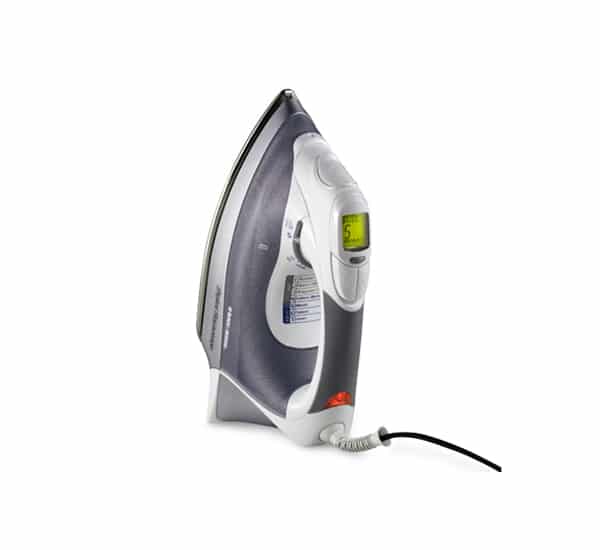
While you can get away with wearing un-pressed clothing sometimes, a crisply ironed wardrobe always looks best. Depending on the item and the occasion, whipping out the iron is sometimes mandatory. Knowing how to iron different garments makes it easy to get great results.
Consider these steps for wielding an iron with flattering results.
First thing’s first: To iron well, you must have a sturdy, smooth ironing surface. These days there are many to choose from, including stand-alone models, wall-mounted, hideaways … even a roll-up ironing board. If you’ve got a standard ironing board, make sure it has a smooth ironing board cover to go over it.
Top off the iron’s tank with distilled water. Avoid using tap water, which tends to be high in minerals that cause build-up on the iron’s metal bottom, which is known as the soleplate. Such mineral deposits can stain your clothing during ironing.
Figuring out what type of material the clothing item is made of will help you determine the right setting to use. The correct setting is important, as an iron that is too hot will burn material and one that is too cool won’t press out wrinkles. Clothing tags generally tell you the material type, such as cotton, and you can then find a corresponding setting on the iron.
The iron is ready when steam is released after you press the steam burst button. This is a button usually located on the handle of the iron that causes the release of steam when you press it. Use this feature to remove stubborn wrinkles when ironing.
An easy way to remember how to iron shirts is to think “neck down.” Work from collar to shoulder to cuffs to the body of the shirt. Follow these steps.
Most pants look best if ironed. Follow these steps:
Place the skirt over the small end of the ironing board and starting from the bottom of the skirt, iron up to the waistline, rotating the skirt as you work.
Keep your iron free of debris and harmful mineral buildup by cleaning the machine after every fourth use, or when the iron no longer glides smoothly over clothing. Clean the iron’s soleplate with a cotton ball dipped in vinegar and use vinegar-soaked cotton swabs to clean out the steam vents — always when the iron is unplugged and completely cool, of course.
To rinse out the interior of the iron, fill the tank with a mixture of half vinegar and half water, heat the iron and flush the system over the sink by pushing the steam-burst button until the iron is drained.
Store your iron free of water in an upright position.
Now that you know the basics of ironing, start pressing and impressing.
As a writer (read: someone who works from home), I know as well as anyone: An organized home office with sufficient storage space leads to a productive and pleasurable work environment. Here’s a rundown of the tools to consider for optimal home office organization.
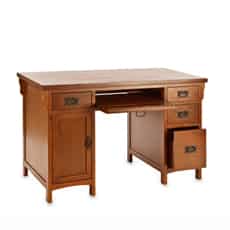 As your central locus of work, your choice of desk is important to providing you with adequate storage and keeping you organized.
First, consider the outside: Besides choosing a desk that is aesthetically pleasing, look for a piece of furniture that is right for the way you work. For instance, if you need a lot of flat, work-surface area, get a desk with some depth. You might even consider one with a return (that’s an l-shaped desk), which will give you even more space. If you only need lots of space once in a while, consider a desk that has a movable work-space, such as a cabinet with wheels, that can be pushed under the desk or out of the way when you don’t need it.
Then, look inside at the storage space offered within the desk. If you need to store office supplies and other items, look at desks with a variety of drawers in different sizes and dimensions, such as a location for pens, pencils and scissors, and another size drawer where you can store files.
Drawers and cabinets filled with a jumbled mess waste space and create chaos. You can choose from a huge range of organizing tools, which come in a wide variety of sizes and dimensions. There are single-item organizers, as well as complete drawer models that allow you to segregate items and create a space for everything. Some are also expandable.
Cabinet organizers help to create additional space and organization in cabinets. Such systems are often also removable, which makes it handy when you want to transport items.
When space is at a premium in the home office, try space-saving storage items like bench storage units and ottomans with storage space built in.
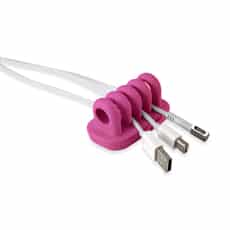 Electronic equipment such as computers, scanners, printers and cell-phone chargers bring what can seem like an overabundance of cords and cables. A variety of cord control products on the market allow you to collect the cords and store them in an unobtrusive manner. Such systems also allow you to easily unplug items without having to sort through all of your cords and cables.
The key to organization in the home office is to stay ahead of clutter–which can be a tall order. Start by planting a trash can next to your desk, so you can throw unwanted junk mail and paperwork out right away, instead of stacking into ever-growing piles for future disposal.
And speaking of disposing, you might consider a shredder to safely dispose of records, receipts and other documents that could put you at risk for identity theft.
Sorting tools such as letter trays, magazine racks, desktop mini filing systems and stackable storage bins also give you a place to put items as they come in for sorting later, rather than creating a pile that becomes unwieldy and difficult to organize.
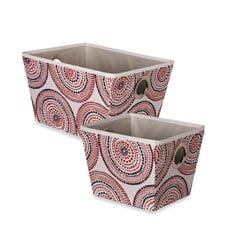 If you have a lot of items and limited drawer or cabinet space, storage bins work well for organizing. There are storage bins in various shapes and sizes, making it possible to find the right size and shape for your situation. You can save space by opting for stackable storage bins and units. Keep these storage and organization tools close at hand, and you can enjoy a well-run home office that rivals any business.
Julie Bawden-Davis
Tell us: What’s your biggest home office organization issue?
Julie Bawden-Davis, author of Indoor Gardening the Organic Way, remembers the first time she encountered scale on one of her houseplants. “I found all this sticky stuff on the floor around my schefflera,” she says. “I firmly accused my kids of spilling something; then a moment later I realized I was standing in scale poop.” Davis’s experience is a typical one when scale insects are in the room. Because scales feed by sucking out plant sap, many of them excrete a sticky substance called honeydew. Its presence on floors or furniture is often the first indication of an infestation.
Mature scales appear as 1/8-to-1/5-inch oval bumps along plant stems and on the undersides of leaves. They’re hard to spot, because they look much like a part of the plant and they’re immobile. The only time scales move is when they are in their minuscule “crawler” stage. Females lay eggs under their hard shell; the eggs hatch into crawlers that move around the host plant to find a suitable place to attach themselves. Soon after they affix to the plant tissue, they form their own hard, protective covering, and there they sit, sucking out plant juices, excreting honeydew, and weakening the plant.
Scale is a common pest of many houseplants, including ficus, schefflera, ivies, pothos, citrus, spider plants, and palms. (Outdoors, scale can infest many plants, including fruit trees.) Carefully inspect newly purchased houseplants–or those being moved indoors for the winter–and quarantine them for 3 weeks to ensure they haven’t come with any piggybacking pests.
“Since their thick, shell-like coat is tough to penetrate, scales can be difficult to control,” Davis says. “The best nontoxic method is manual removal.” Crush the insects with a cotton ball or cotton swab soaked in isopropyl alcohol and continually monitor the plant for further infestations. Commercial preparations of insecticidal soap are effective, too. Use a sprayer to apply it to all plant surfaces every 7 to 10 days for 2 months. And, until the scale is gone, keep infested plants away from healthy ones.
Photo: United States National Collection of Scale Insects Photographs Archive, USDA Agricultural Research Service, Bugwood.org
Budget dates can be better than those at fancy restaurants. The emphasis on relating and innovating rather than impressing creates a low-pressure situation that gives you a chance to build chemistry and develop memories. The following free or cheap date ideas are heavy on relating and light on the wallet.
People watch
Take up residence in a crowded place like a shopping mall or coffee shop, sit back and, as inconspicuously as possible, analyze passersby or those sitting nearby. Try to read lips and watch body language and then compare notes with your date. You’ll probably never know if you’re right about what’s going on, but hearing what each of you think is entertaining, and the sport is totally free.
Visit open houses
If there are new housing developments nearby featuring model homes, spend the day roaming through mansions, condos and everything in between. This enlightening activity shows new trends in home building and interior design, and you’ll probably walk away with some great free decorating ideas.
Browse an art gallery or museum
Art galleries require no admission and museum tickets are usually reasonably priced. Some museums also feature free admission on certain days of the week, for special occasions or if you qualify by age or membership in certain organizations.
Go to your local bookstore
Visit your local bookstore, get a cup of coffee or tea if it’s available, and look for your favorite books. Then trade with your date and see what he or she thinks of your taste in literature. You’ll discover what you both like to read and may find common interests.
Walk along the water
Water tends to soothe the nerves and encourages conversation to flow. If you live near water, whether it be the ocean, a lake or even a stream, walk and see where it takes you. Bring along a picnic or small snack and stop along the way to refuel and enjoy the view.
Hit the rink
Take a trip down memory lane or try something new and roller skate. It usually costs very little for admission and skate rentals, and this is a good way to discover if your date is adventurous.
What cheap date ideas have you found to be fun?
We know, we know: Creamy is dreamy when it comes to comfort food. And sure, macaroni and cheese, pot pies, and ice cream are awesome. But they’re also hard on the waistline, which means these soothing dishes aren’t doing much to help you keep your healthy resolutions.
The good news: You can tweak your favorites with a variety of handy kitchen gadgets and low-fat substitutions to make them whole lot healthier. Try these tips and enjoy some of your classic favorites–without the guilt.
Make a lower-fat version of ice cream using the Yonanas™ Ice Cream Treat Maker. This kitchen gizmo transforms frozen bananas and other fruit into a low-calorie, nutritious, and creamy treat that actually tastes like soft-serve ice cream. Since Yonanas uses only frozen fruit, the “ice cream” contains zero fat and cholesterol, plus it’s loaded with fiber, vitamins, and minerals.
There’s a formula for duplicating thick, rich mac n’ cheese with a low-fat alternative: Cut back on the cheese by 40 percent to 50 percent and replace it with creamy ingredients like low-fat cottage cheese. Make it even healthier by using using 1% milk and whole-wheat pasta. If you want more of that yummy, crispy crust on your M&C, try baking servings individually in small stoneware bakers.
With its thick, flaky crust, chicken pot pie is traditionally high in fat and calories. You can cut the fat by adding extra veggies, including peas, carrots, and mushrooms and by using low-fat chicken breast combined with low-fat chicken broth. Top the filling off with a 6-layer topping of phyllo dough brushed with olive oil, which creates a luscious crispy coating during baking.
This typically deep-fried ultimate comfort food responds well to the low-fat cooking technique of baking. Create a low-calorie version of the well-loved crispy coating by combining breadcrumbs, black pepper and garlic salt mixed with a small amount of olive oil. Coat a baking sheet with cooking spray and bake the coated chicken pieces in a hot oven.
With its rich, creamy texture, pudding tops the charts of classic comfort foods. Try making sugar-free instant pudding with non-fat milk, and give the low-calorie pudding a delectable velvety texture by mixing it in a blender at high speed.
Rich, tempting cheesecake can be transformed into a low-fat version by replacing half of the whole eggs with egg whites, substituting low-fat cottage cheese for cream cheese and using a light graham cracker crust.
Make a dense, moist chocolate cake or cupcakes using pumpkin! Replace the eggs and oil in the recipe on the cake mix box with a 15-ounce can of pumpkin (not pumpkin pie mix!). It reduces the amount of fat and calories, and adds fiber, vitamin A, and antioxidants. You won’t taste the pumpkin; just a moist, chocolatey cake.
Did we miss your favorite comfort food? Tell us about it below!
When it comes to bath time, parents and children have different agendas. Your first order of business might be getting your child squeaky clean, but the kids? Well, they just want to have fun. You can both get what you want–if you use these easy kids’ bath time tips for all ages and stages.

Establishing a pleasant bathing routine sets the stage for your little one’s bath time attitude. For newborns and infants, the goal is to create security and comfort — for both of you. One way to do that is to place your baby in a snugly wrap that envelops him or her during bathing (these come as either a removable part of the baby bath or as separate bath wraps). Another way to keep things comfy is by using an attachable sink hose-end sprayer that features a gentle setting. And make sure to wrap your baby in something soft when you’re done, like a terrycloth towel or towel apron that keep you dry and your baby warm and snuggly.
 Toddlers are becoming more aware of their surroundings, and they’ll enjoy exploring and playing at bath time with your help. Many infant baths convert for toddlers, allowing your little one to sit up when he’s ready. When it’s time to move into the big bathtub, make sure he or she stays secure and happy by using a non-slip bathmat in the tub.
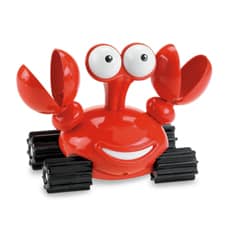
This is the time to introduce some fun in the bath. Look for floating, squirting rubber bath toys, from the classic duckies to hippos, boats, and cars to elicit squeals of sudsy laughter.

Provide fun activities and bathing may become your preschooler’s number-one favorite pastime. Now that your child has more developed fine motor skills, you can introduce a wide variety of bath toys, including tub crayons, which allow him to do freely what you’ve told him never to do—write on the walls. Mini squirt guns are also fun—especially if you have more than one little one in the bath.
Easily gather, rinse and hang to dry all of your child’s toys once the bath is done with a bath storage basket.
The grade-school years offer more opportunities for bath time fun, from scented, colored bath fizzies that effervesce in the water, to actual bathtub games like ring toss and paddle ball. You can add an educational twist to the experience with wet-and-stick foam letters and shapes that stick to the bathtub wall, encouraging your child to spell words and create imaginary scenes with animals, such as dinosaurs. Waterproof bath books allow your child to practice her reading skills. Your kid can also play “house” in the bathtub with items like bath-time dolls and tea sets.
Now that you know the secrets to bath-time fun for kids, fill up the tub and let the splashing begin.
Julie Bawden-Davis
All those in favor of a new optometrist in town, say “eye!”
The husband-and-wife team of Dr. Alex Romero and Dr. Ly Nguyen have recently taken overOrange Circle Optometry in Old Towne Orange at 227 East Chapman Ave., #C. The practice, which previously belonged to longtime optometrist, Dr. Robert Turner, is located across the street from Watson Drugs between Orange and Grand on the same block as the Elk’s Club.
According to Dr. Alex Romero, Orange Circle Optometry provides primary eye-care health, including comprehensive eye examinations, contact lens and glasses fittings, laser vision co-management, management of ocular diseases, cataract evaluation and much more.
There’s also a great selection of designer frames by Prada, Dior, Coach, Gucci, Versace, Armani and Juicy Couture, to name a few.
“We sell unique kinds of glasses and sunglasses that are hip and fun,” says Dr. Romero. “We even have wooden frames. The students at Chapman really like our inventory.”
Originally from Orange, Dr. Romero grew up here and attended Orange High School. He and his wife, Ly, attended Nova Southeastern University in Florida, where they first met.
“She grew up in the city of Upland and both of us went to college at UC Riverside,” he says. “We’re both from here, and in fact, we used to live 15 minutes apart from each other in Orangebefore we met in Florida. We moved back here, got married two years ago and purchased the office. I’ve always wanted to open a practice in the city of Orange. It’s just great to be here.”
Modernizing the interior, the couple updated the décor with new paint, furniture, fixtures and hardwood flooring. They also brought in new computer technology and state-of-the-art equipment.
Since re-opening in August, the practice has been well received by new and former patients alike.
“Everyone has been very welcoming, and our fellow business owners have also been very supportive and kind,” says Dr. Romero. “Our patients are very loyal to the city of Orange and live within walking distance from us. The people here are what make it special. We feel very fortunate to be here.”
Published in the Jan/Feb 2013 edition of the Old Towne Orange Plaza Review
Written by Karen Anderson, Photograph by Jeanine Hill
![]()
JANUARY 04, 2013 Though he owns a small business in a staid industry bound by government regulations, Robert Gorelick knows that to stay ahead of the crowd, running an innovative company is crucial.
“Being successful as a small business is about more than getting the job done,” says Gorelick, president of Benefit Equity, Inc., a national company founded in 1989 that consults with small-business owners on their company retirement plans. “To gain market share as a company, you must innovate.”
1. They employ creative marketing. As the owner of a business in the financial industry, which tends toward a conservative approach to marketing, Gorelick finds that he gets his most inspired ideas by looking at other industries.
“Being innovative takes an open, inquisitive mindset that encourages you to look outside of your comfort zone to analyze what has successfully been done in other industries so you can adapt those tactics to your business,” he says.
This approach has resulted in a number of successful marketing campaigns unique to Gorelick’s industry that have gained his company attention, such as a recent campaign that involved sending potential clients mini dartboards.
“The dartboards are small and fit on their desks, and then we’ve followed up with ‘dart’ letters explaining how we can help them meet their business goals,” he says. “The fact that few in my industry would use this sort of marketing campaign has made us stand out.”
2. They’re adaptive. Necessity truly is the mother of invention, and this mindset drives innovative companies. Successful small-business owners know that the only constant is change and only companies that adapt to change survive and thrive. When you run a business that encourages acknowledgement of change as a constant and promotes adapting to change, you create an office culture that values creativity and innovation.
3. They’re customer-focused. Innovative companies know that customer reactions to services or products reveal a great deal about what sort of changes can be made to better serve them. By keeping in touch with clients and making them feel comfortable shopping and purchasing your services, you create an environment where innovative ideas flourish, says Sue Jackson, owner of the specialty retail shop Country Roads Antiques & Gardens, which has been in business in the same location since 1993.
“By staying in constant contact with your customers, you create a fertile environment that breeds innovative ideas,” she says. “It’s amazing how far you can get with simple words such as ‘thanks for coming in,’ or ‘nice to see you.’ And it’s incredible how much information your customers’ reaction to those words will get you.”
4. They channel drive and ambition. Innovation takes targeted thought, and targeted thought requires that you remain focused and driven. When you’re determined to succeed, you automatically find yourself looking at every possible angle for achieving success, and many of those angles turn out to be truly innovative.
5. They don’t fear experimentation. Innovative companies experiment constantly. Those small-business owners who succeed know that it takes much more than sticking with the status quo to thrive. While it’s definitely advisable to hold close those tried-and-true methods of selling your products or services, at the same time it’s also important to constantly branch out and ask yourself, “What if?”
Of course, it’s risky to experiment and carry a product that you’ve never sold before or offer a new service, but doing so is the only way to know what works and what doesn’t. It’s only a matter of time before one of your innovative experiments turns out to be a goldmine.
Try adding these traits of innovative companies to your business success arsenal, and you’re sure to come out a winner.
Photo: Thinkstock
A freelancer since 1985, Julie Bawden-Davis has written for many publications, including Entrepreneur, Better Homes & Gardens and Family Circle. Julie blogs via Contently.com
.
Ronna Coe knows that the best workforce is one that’s well-established. As a small-business owner, she focuses on retaining top talent and ensuring workplace motivation through non-monetary strategies.
“Our business involves a real team effort, and it’s important that all employees know their value to the finished product and to customer satisfaction,” says Coe, chairman of Coastal Component Industries (CCI). The company, founded in 1990, manufactures electronic components for the military, defense, and aerospace sectors. It employs 18 people—more than half of whom have been with CCI for over a decade.
Despite economic challenges, Coe is committed to maintaining morale. In addition to 100% company-paid employee health insurance and year-end bonuses, she implements intrinsic motivators inspired by Work Happy: What Great Bosses Know by Jill Geisler.
Encouraging employees to leverage their natural talents fosters satisfaction and productivity. At CCI:
“We strive to always thank employees for a job well done when the work meets deadlines and our expectations,” says Coe.
Offering flexible work arrangements shows trust and respect. Some examples include:
“I am always open to ideas, as long as we can continue to serve our customers well,” Shader notes.
People perform best when their work aligns with their values. Shader takes the following approach:
“Once you determine what fuels an employee’s sense of purpose, they feel appreciated and you get their best,” she explains.
Keeping employees informed about company milestones creates a sense of pride. At CCI:
“They walk away feeling good about their progress,” says Coe.
Even during tough economic times, businesses can foster motivation and retention by implementing these meaningful, non-financial strategies.
Read more articles on how to keep employees’ morale up.
Photo: Getty Images
Unless you’re St. Nick toting a bag full of presents, catching and holding the attention of kids at a Christmas party takes some creativity. Here are some festive and fun ways to keep children happy and entertained throughout your holiday celebration.
Let kids express their creativity with individual gingerbread houses. Provide a variety of colorful decorations and tasty treats, such as:
Set out extra candy for snacking and don’t forget to capture photos of each child with their frosted creation!

Get the kids into the holiday spirit with a hands-on cookie baking session. Give them:
After baking, let them decorate the cookies with sugar sprinkles and icing. Provide cellophane and ribbon so they can package cookies to take home as party favors.
Related: Tools for Decorating Cookies for the Holidays
Keep the energy going with engaging games such as:
Hand out puzzles and set a timer to see which child can complete one the fastest for added competition.
Spark imaginations by helping the kids create a collaborative Christmas story. You’ll need:
Have the children gather and dictate a story as you write. For inspiration, they can base it on holiday classics like the “Twelve Days of Christmas” or “Frosty the Snowman.” Let them illustrate each page, either as a group or in smaller teams.
Encourage each child to craft a personalized ornament to hang on their tree. Provide:
This thoughtful keepsake is a fun way for kids to remember the holiday celebration.
With a little planning and a lot of creativity, you can host a magical children’s Christmas party even Santa would be proud to attend.
A full house for Thanksgiving dinner makes for a festive occasion but also creates some logistical challenges—like where to seat the kids. Sitting through a long meal with adults can be tough for many children. One fun and effective solution is to create a special kids’ table just for them.
Here are some great ways to set up a welcoming and entertaining spot for your youngest guests this Thanksgiving.
Make the table child-friendly with these options:
Set the scene with fun, seasonal decorations:
Keep kids entertained while adults enjoy their meal:
Offer a variety of kid-approved menu items to ensure they enjoy their meal:
Let the kids decorate their own cupcakes by setting out orange, brown, and white frosting, cake decorating tools, and a variety of sprinkle toppings.
Keeping the kids busy and happy this Thanksgiving with their very own table leads to plenty of time for you to enjoy delicious food and quality conversations with friends and family.
When it comes to minimizing tax liability, small-business owners can use all the help they can get. One area where it pays to understand tax law is capital gains tax.
Selling capital assets—such as real estate or stocks—through your business results in a capital gain or loss. The difference between the purchase and sale price determines your gain or loss. When you have a capital gain, you owe capital gains tax.
According to Ken Moll, founder and principal of Integrated Executive Solutions (IES), “Effective capital gains management leads to a smaller tax bill, which means you have more working capital and better cash flow.”
Capital gains tax directly affects how small-business owners manage their assets. Mistakes in handling capital gains can result in costly tax penalties and legal or accounting fees, says Kevin Cloward, CPA and senior manager at Saddington Shusko.
Capital assets include:
They exclude inventory, certain creative works, accounts receivable, and specific U.S. publications.
Capital gains tax applies to assets sold for more than their “basis”—the acquisition cost minus any depreciation, amortization, or disposal fees. For example, if you sell a property for more than you paid (minus closing costs), the profit is taxed.
Tax treatment depends on the classification of the asset:
“Intent is everything,” says Cloward. Determining whether an asset is capital or dealer property is often contested in tax court, so be cautious.
Tax rates vary based on how long you hold the asset:
To reduce tax liability, hold appreciated assets for more than 12 months. However, with the new Medicare tax, consult your accountant about timing asset sales.
For non-dealers, spreading payments over multiple years allows gain to be recognized gradually, reducing immediate tax impact.
Also known as a “like-kind exchange,” this strategy allows you to defer capital gains by reinvesting proceeds into a similar type of property within 180 days.
Armed with this knowledge and guidance from your accountant, you can make smart tax decisions that improve your business’s financial health.
By: Julie Bawden-Davis | Date: October 14, 2012

Whether you want to offset the cost of owning a vacation home, don’t use it often, or are concerned about it sitting vacant, turning it into a rental could be a smart move. Here are six practical tips to help you convert your vacation home into a rental property.
Determine your rental income goals and usage limitations:
Consider your location, availability, and interest in hands-on management:
Stock the home with key items to enhance the guest experience:
By following these tips, you can transform your vacation home into a rental that brings in income while allowing others to enjoy its charm.
Maintaining clean carpets keeps your home looking and smelling fresh. Regular carpet cleaning—whether by shampooing or steam cleaning—also helps extend the life of your flooring. Here’s a breakdown of the pros and cons of each method.
Shampooing involves a carpet cleaning machine with a solution tank and a spinning nylon brush. The machine distributes cleaning solution into the carpet to create foam, which is scrubbed in a circular motion. Vacuuming is required both before and after cleaning.

Steam cleaning uses a high-powered vacuum and pump system, often attached to a truck or a portable unit. A cleaning wand sprays hot water and cleaning solution into the carpet while a vacuum hose extracts the dirt and moisture.
Understanding the advantages and disadvantages of both methods helps you make the right choice for your home and your carpeting needs.
Published: October 08, 2012
By Julie Bawden-Davis, Writer/Author/Publisher/Speaker, Garden Guides Press
Summary: In the social media age, customers expect to engage with the businesses they patronize. Here are out-of-the-box ways to show your gratitude.
When small-business owner Beth Davidson wants to thank customers for their patronage, the owner of Dragonfly Shops & Gardens believes in making the acknowledgment public—often through social media.
“If it’s appropriate, I try to thank people in a way that is most beneficial to them,” says Davidson, whose boutique retail shop in Orange, California, offers home and garden items, personal goods like clothing and jewelry, and a variety of classes. “Recently, I did a shout-out on Facebook about a customer who does wedding photography and recommended her services.”
Smart business owners know that thanking customers is not only polite—it’s also good business. When those thank-yous are clever and innovative, the impact is even greater. Realtor Kathy McCarthy agrees. She invests a lot of time in creative client recognition.
In honor of National Customer Service Week, consider the following inventive ways to spotlight your clients:
“Chit-chat reveals a great deal,” says Davidson. “You may discover they own a studio, sell insurance, or are collectors of your goods.”
Celebrating your customers can be a fun and fulfilling endeavor that leads to stronger relationships and increased loyalty—any time of the year.
For more insights, check out additional customer service advice.
Julie Bawden-Davis has been a freelance writer since 1985, contributing to publications such as Entrepreneur, Better Homes & Gardens, and Family Circle. She also blogs via Contently.com.

If you think beauty pageants are just a sea of pretty faces, you’ll want to attend this year’s Miss City of Orange Scholarship Pageant. Taking place on Saturday, September 17th at Chapman University’s Memorial Hall at 7 PM, the event showcases not only beauty, but also talent, intelligence, and leadership.
Contestants compete in the following areas:
The winner becomes an ambassador for the City of Orange for the following year.
“People were surprised by how involved I was in the community and how well-rounded I am,” says Berry, a Chapman University graduate. “I considered my reign a part-time job. I ran for the title to get to know the city and its leaders. Once people understand how the pageant works, they respect how it empowers young women.”
“Many girls will tell you the program changed their lives,” says Benson, who has served as Executive Director for nine years. “Miss City of Orange attends numerous local events, hosts a ‘Queen for a Day’ leadership workshop for 2nd through 6th grade girls, and represents a charity of her choice.”
She adds that the skills learned—public speaking, leadership, and networking—are invaluable, and that over $5,000 in scholarships is awarded each year.
Winners of Miss City of Orange go on to compete in Miss California. Rachel Berry placed in the top 10 in both 2010 and 2011, winning in the talent and interview categories. Notably, Miss City of Orange 2009, Noelle Freeman, won the Miss California title in 2011.
In its 76th year, the pageant evolved from a community event to a franchise of the Miss California Scholarship Pageant in the 1980s, thanks to then-Executive Director Elsa Olson. Since then, City of Orange winners have proudly represented their community at the state level.
“Even if you don’t win, the process is worth it,” says Berry. “You learn about yourself, improve your public speaking, and build lifelong skills.”
The Miss City of Orange pageant is a non-profit, all-volunteer organization. Contestants do not pay an entry fee, and each participant receives scholarship money. For more information, visit the official website:
MissCityofOrange.com.
Published in the Sep/Oct 2011 edition of the Old Towne Orange Plaza Review
Written by Julie Bawden-Davis, Photograph by Rachel Berry